Thursday, February 28, 2013
Pizza Dinners at McCormick
This weekend was the first of four spring semester make-your-own pizza dinners here at McCormick - a student favorite, for sure! The housemasters made a movie to show how to make a pizza in their apartment, so if you're interested in seeing the pizza assembly line, check it out! This is their 20th year of pizza dinners, so they've really got it down to a science.
(also, check out their kitchen. I am so jealous)
Tuesday, February 26, 2013
MACS Column
It's only natural that on a day I donate blood that I talk about what I usually do every day with human blood...feed it to my parasites!
Okay, feed is kind of a misnomer, but it's close. Malaria parasites that we work with in the lab are cultured in human blood, and they infect the red blood cells within the blood. They do harvest some of the stuff that's in the red blood cell, but they also get nutrients from the media we use, which is formulated to be similar to human plasma.
So--a red blood cell is the main vehicle for exchanging oxygen and carbon dioxide in your body, and they are very, very good at it. This is mostly because they are stuffed to the brim full of a protein called hemoglobin, which in turn has four heme molecules inside it, each with an iron held in place in the center (the iron, seen below in yellow, is what helps the oxygen bind to the hemoglobin, believe it or not!).
from Sigma Aldrich
Now, when a parasite invades a red blood cell, it has a problem. It's new home is full of other stuff...hemoglobin! And the parasite needs space to grow. So, it begins to break down the hemoglobin proteins, but the heme groups are a different story. In cells, free iron is actually toxic, so releasing it would be a bad thing.
Instead, the parasite has this marvelous trick; it takes the heme group and turns it into a crystal called hemozoin to make sure the iron is sequestered away:
from Wikipedia
In turn, scientists like me have made use of the parasite's iron sequestration to help us with research...our own neat trick! Iron inside hemozoin is diamagnetic, but when the parasite crystallizes it into hemozoin, the iron is actually paramagnetic (citation here).
While you may not understand the technical descriptions of paramagnetism versus diamagnetism, you know that there are some things in this world that are diamagnetic...ceramic coffee cups, paper, plastic bottles. They don't stick to magnetized surfaces. However, paramagnetic things like refrigerator magnets do in fact stick to magnetized surfaces.
This means that the parasite-infected cell is magnetic...it will stick to a magnet! And science has designed a column that allow the infected cells to stick to magnetic beads inside it, and let all the other stuff flow through. This allows us to have a solution of concentrated infected cells for experiments...a process we call enrichment.
Step 1: Check the parasitemia.
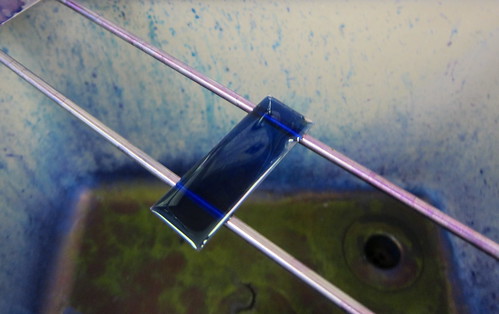
Big word, easy concept. I need to know what percentage of red blood cells have a parasite in them and make sure it's within the right range. I smear blood from our cultures onto a glass slide, fix it with methanol, and then dye it with Giemsa.
Giemsa gets...everywhere. Literally. I spilled some on my lab coat a year ago, and it's going to be there forever. It's the dye equivalent of what would survive the apocalypse.
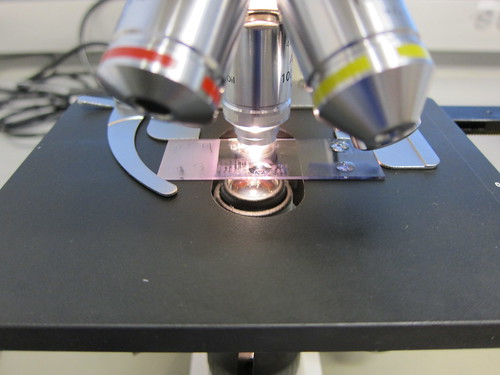
I use a 100X objective to look at the cells under the microscope. The dots of oil are required for the microscope to look at something that small (a red blood cell is about 10 µm, or micrometers, meaning about 20 of them in a row would be the same size as the diameter of a human hair).
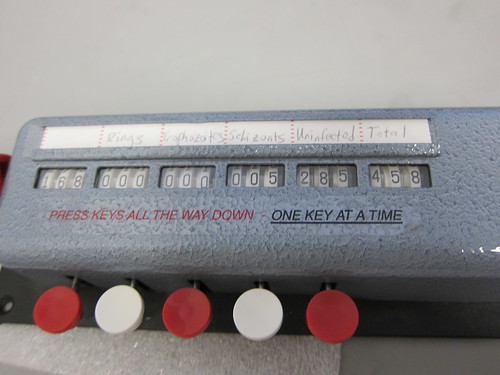
The Niles lab is old school...this is a counting apparatus to allow for counting the parasites of different ages while we look under the microscope. For some experiments, knowing the age of the population is actually really important.
So, now that I know that the parasitemia is in the right range and the parasites are the right age, I can go forward with the experiment!
[an aside...this is the part that's actually really tricky about culturing. Having the parasites be the right age and having the right amount inside a flask is much harder than it looks, and it takes a lot of time to ensure that your cultures are happy, and ready when you need them. Hence why I spend at least an hour on just basic culturing every day, including Saturday and Sunday. It's definitely a skill, with about 5% uncertainty mixed in, much to my chagrin. Sometimes all your cultures just crash, for no discernible reason. Obnoxious.]
Step 2: Set up the column.
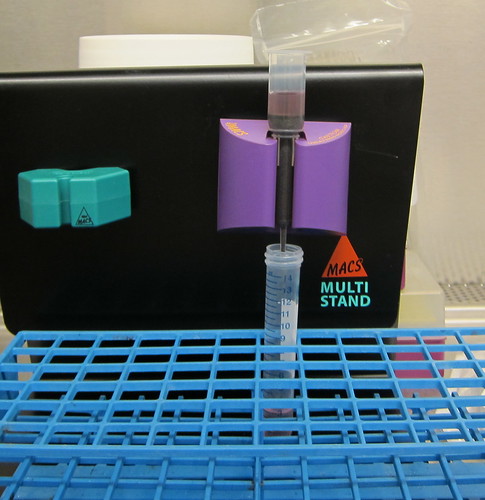
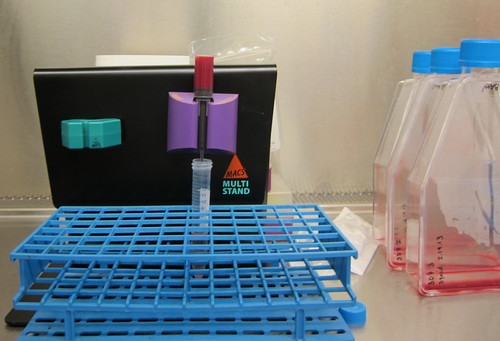
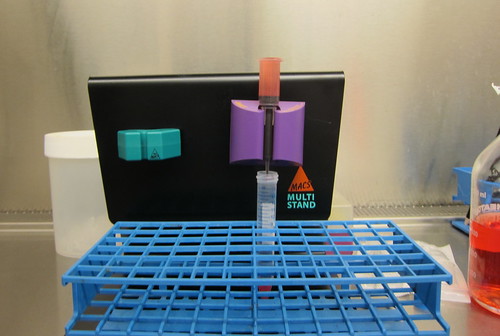
--the black MACS Multistand is magnetic and has two holders for columns that are teal and purple. --the thing in the purple holder is a MACS column
--the black stuff inside the MACS column is magnetic beads.
--the red stuff on top in the MACS column is the media we use, and we put in on the column to wash it and make it more hospitable for cells.
Step 3: Prepare cells.
--the black stuff inside the MACS column is magnetic beads.
--the red stuff on top in the MACS column is the media we use, and we put in on the column to wash it and make it more hospitable for cells.
Step 3: Prepare cells.
A peek into the incubator -- you can see some plates in the back, and the red capped things that look like they have flowers on them are 10 mL flasks. This is the normal size for regular maintenance. I'm using rather large blue-capped ones for a 30 mL culture (you can see them off to the side in the next picture). Since red blood cells are heavier than the media, they are on the bottom of the flask, making it easy to remove the media. At that point, I can bring them up in a volume that fits on the column (in this case, the bright red that you see in the picture below is 6 mL).
Step 4: Apply infected red blood cells to the MACS column.
Step 4: Apply infected red blood cells to the MACS column.
It takes about 30 minutes for this viscous blood and media mixture to drip through the column.
Almost there!
Step 5: Wash column.
Step 5: Wash column.
Because I'm using such a high number of cells, it's a good idea to send a bit more liquid through to make sure that the things that are stuck to the column are the magnetic infected red blood cells I want.
Step 6: Elute!
Step 6: Elute!
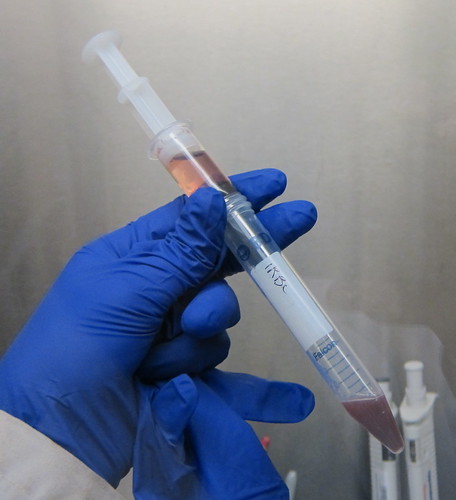
Look at this contraption! To speed up the process of getting the infected cells from off the column, I first remove the column from the magnet, and then use a syringe to flow liquid through that will take the infected cells with it!
Step 7: Spin down, and you're done.
Step 7: Spin down, and you're done.
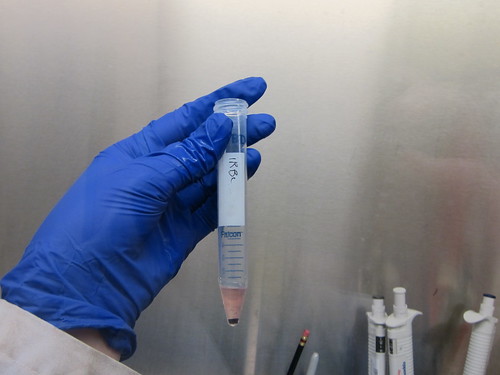
At this point, I put this conical tube into a centrifuge, and it pellets the heavy infected cells to the bottom of the tube.
Congratulations, you have parasite-infected cells ready for experiments!
(writing this protocol up reminded me that each of these pellets represents about 15 hours of work...yikes)
Congratulations, you have parasite-infected cells ready for experiments!
(writing this protocol up reminded me that each of these pellets represents about 15 hours of work...yikes)
Sunday, February 24, 2013
MIT on lockdown
Lest you think "it can't happen to you" ---MIT woke up to quite the scare yesterday morning:
Friends emailed me from around the country after hearing about it on the news---but MIT text alerts kept us all in the dorms, and police tape cordoned off the search grid on campus.
Thankfully, it ended up being a false alarm---and no one really knows what happened.
All I know is thank goodness everyone is safe and sound.
Edit: turns out this was a hoax. The MIT population is using this as an unpredicted drill, and there are safety meetings going on all over campus for different sectors of the university (I went to one this week in my GRT capacity). It wasn't for naught, that's for sure.
from Isabel Ruiz, MIT's Executive VP and Treasurer:
Israel Ruiz
Friends emailed me from around the country after hearing about it on the news---but MIT text alerts kept us all in the dorms, and police tape cordoned off the search grid on campus.
Thankfully, it ended up being a false alarm---and no one really knows what happened.
All I know is thank goodness everyone is safe and sound.
Edit: turns out this was a hoax. The MIT population is using this as an unpredicted drill, and there are safety meetings going on all over campus for different sectors of the university (I went to one this week in my GRT capacity). It wasn't for naught, that's for sure.
from Isabel Ruiz, MIT's Executive VP and Treasurer:
The incident itself
On Saturday, February 23 at 7:28 AM, the dispatch center at the Cambridge Police Department (CPD) received an electronic communication reporting an emergency at 77 Massachusetts Avenue. The communication came through a Sprint relay message service designed for people with hearing or speech impediments. The communication went on for more than 18 minutes, with a Sprint relay operator interacting with the caller and in turn communicating with a CPD dispatcher.
On Saturday, February 23 at 7:28 AM, the dispatch center at the Cambridge Police Department (CPD) received an electronic communication reporting an emergency at 77 Massachusetts Avenue. The communication came through a Sprint relay message service designed for people with hearing or speech impediments. The communication went on for more than 18 minutes, with a Sprint relay operator interacting with the caller and in turn communicating with a CPD dispatcher.
One minute into the communication, the caller reported someone with a
“really big gun,” and “armor” who was “getting out of control.” The CPD
dispatcher immediately sent CPD units and State Police to the site, and notified
MIT Police.
Within two minutes of being notified, the first MIT Police units entered
Building 7. A team of six MIT Police officers coordinated with upwards of 25 CPD
and State Police to immediately secure the area to keep the community safe and
to search the Main Group. This tight teamwork was possible because all MIT
Police officers train with CPD for emergency scenarios.
At 7:32 AM, the caller identified the alleged gunman by name. The person
named was confirmed to be a member of MIT's staff. This person was later
questioned and found not to be connected to the incident in any way.
At 7:35 AM, the caller identified MIT President Rafael Reif as the target
and said that the alleged gunman was heading towards the administration offices.
At 7:37 AM, the caller indicated that the alleged gunman was retaliating against
people involved in the suicide of Aaron Swartz. The officers continued their
search of the Main Group and proceeded to a second location to ensure the safety
of MIT’s President. At 8:52 AM, a campus-wide alert was sent.
Assessing MIT’s response
The tactical police response was outstanding, with an incredibly fast response time. Our officers worked actively to search and secure the buildings until they could confidently issue an “all-clear” a few hours later. We are deeply grateful to these officers for their courage and professionalism.
The tactical police response was outstanding, with an incredibly fast response time. Our officers worked actively to search and secure the buildings until they could confidently issue an “all-clear” a few hours later. We are deeply grateful to these officers for their courage and professionalism.
It is clear, however, that while the officers focused on securing the area
and ensuring the safety of the targeted individuals, we should have alerted the
community about the threat much more quickly and that the communication
protocols we had in place did not meet the community’s reasonable expectations.
We have already revised our procedures to make sure that we are now in a
position to alert the community within minutes of such an incident.
The incident was a hoax – but this is not a game
As we all know by now, there was never a gunman on campus. The reported sighting was a hoax. But that does not mean that it was minor or to be taken lightly. For a time on Saturday morning, upwards of 30 armed police officers were searching a building for a person they believed was also armed; it is not hard to see how someone could have been seriously injured by mistake. This hoax also involved a malicious allegation against a member of our community and direct threats of physical harm to MIT staff. We should all understand that this is not a game.
As we all know by now, there was never a gunman on campus. The reported sighting was a hoax. But that does not mean that it was minor or to be taken lightly. For a time on Saturday morning, upwards of 30 armed police officers were searching a building for a person they believed was also armed; it is not hard to see how someone could have been seriously injured by mistake. This hoax also involved a malicious allegation against a member of our community and direct threats of physical harm to MIT staff. We should all understand that this is not a game.
Next steps
This incident has created the opportunity to refresh the community’s understanding of MIT’s safety protocols and procedures. In the near future, we will incorporate such training into MIT’s many orientation programs. I have also asked MIT’s Security and Emergency Management Office (SEMO) staff to reach out and share this information with all facets of our community, including those living in our residence halls and FSILGs. These briefings will start next week.
This incident has created the opportunity to refresh the community’s understanding of MIT’s safety protocols and procedures. In the near future, we will incorporate such training into MIT’s many orientation programs. I have also asked MIT’s Security and Emergency Management Office (SEMO) staff to reach out and share this information with all facets of our community, including those living in our residence halls and FSILGs. These briefings will start next week.
In the meantime, rest assured that we have redoubled our efforts to ensure
the safety of the MIT community, to protect the security and integrity of our
campus, and to preserve our shared ability to advance the work of MIT.
Sincerely,
Israel Ruiz
Friday, February 22, 2013
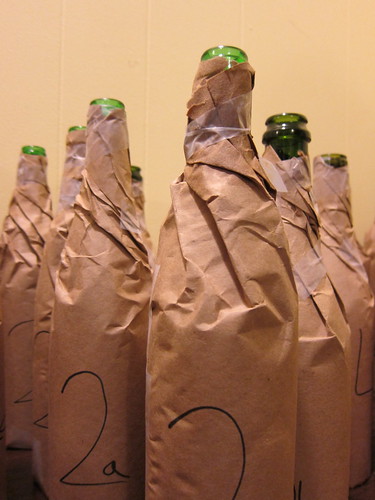
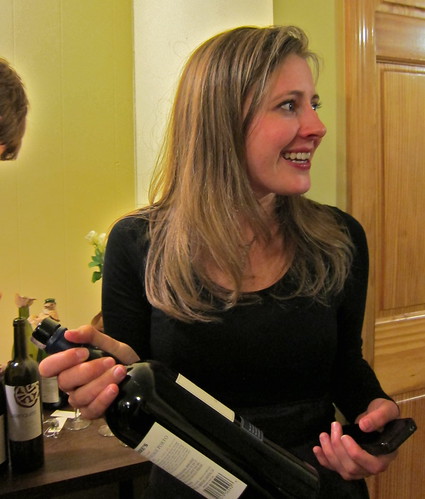
Wine tasting!
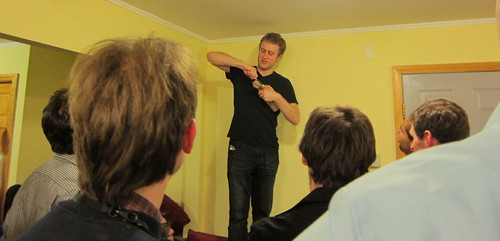
The man himself, giving us lessons about wine.
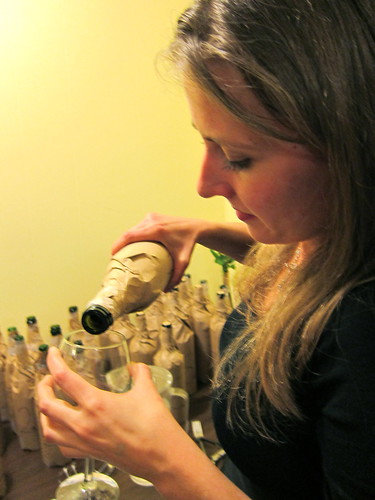
We are expert wine-pourers. (I even poured 21 glasses from a magnum bottle without spilling!)
(for a description of the wines, here's a more thorough review of the night)
(for a description of the wines, here's a more thorough review of the night)
Wednesday, February 20, 2013
AAAS Family Days
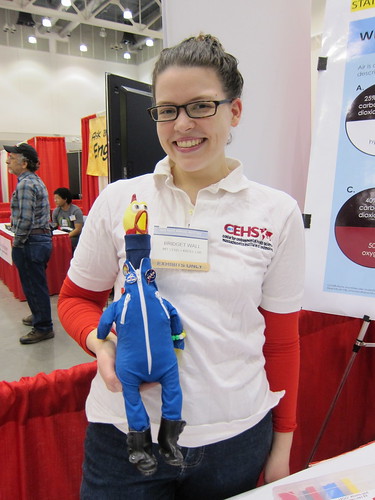
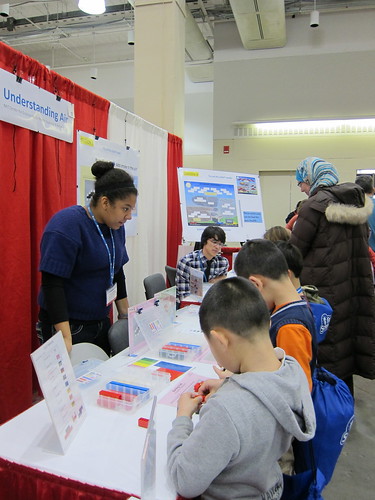
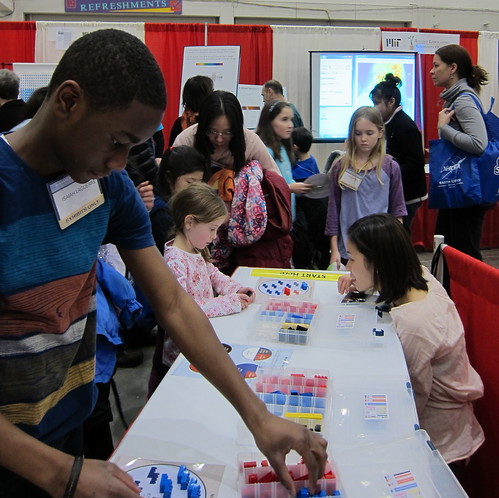
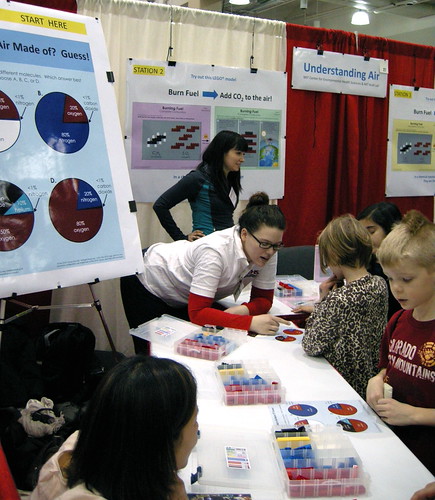
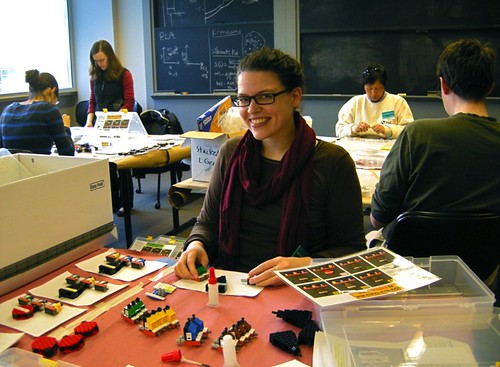
I helped out at the AAAS Family Days this past weekend, explaining pollution and the atmosphere to kids using Legos. (more info here, it's a really cool idea)
A visitor to the booth: Camilla, NASA's rubber chicken mascot (oh yes, she has a twitter feed)
I love this one, I totally have my teacher face on.
A visitor to the booth: Camilla, NASA's rubber chicken mascot (oh yes, she has a twitter feed)
I love this one, I totally have my teacher face on.
Monday, February 18, 2013
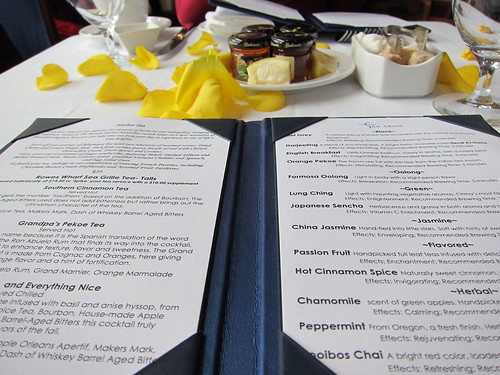
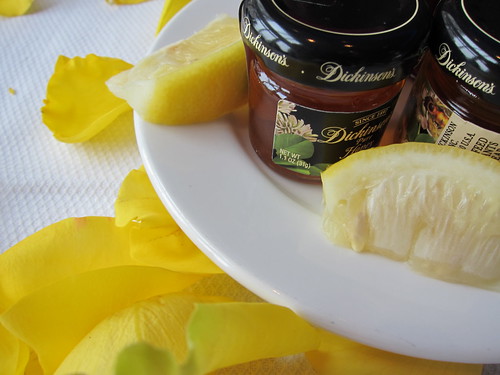
Afternoon tea
As is probably obvious from the many posts I have on this blog about drinking afternoon tea, I love this confluence of good friends, warm drinks, and delicious food. (afternoon tea with my mom in 2012, birthday tea in 2012, tea tasting in 2012, Boston Tea Party tasting in 2012).
Yesterday brought us back to the Boston Harbor Hotel, where they unfortunately have raised their afternoon tea prices to $39 (and that's without the champagne!). It used to be $18, quite the steal, but now, it's just as expensive as L'Espalier.
Yesterday brought us back to the Boston Harbor Hotel, where they unfortunately have raised their afternoon tea prices to $39 (and that's without the champagne!). It used to be $18, quite the steal, but now, it's just as expensive as L'Espalier.
Saturday, February 16, 2013
Semlor
from the incredibly wonderful series of fashion + something else beautiful by the brilliant Ms. Moss (original photos from Notions and Notations of a Novice Cook and Tommy Ton)
I had my first taste of semlor when my mother, brother, and I visited our relatives in Sweden after seventh grade...even though it was summer, my great aunt had the foresight to save three almond buns for us in the freezer, carefully wrapped and stashed away my fika-loving great uncle. You see, you're only really supposed to eat them on Shrove Tuesday, before Lent begins, but she knew that we'd like to try them. We ate them with fresh whipped cream, loving the strong almond flavor reminiscent of Spritz cookies.
A couple years ago, I received a Swedish cookbook from my mom with a recipe for these very same almond buns, and I had to try it. The recipe wasn't hard, but time consuming, and needed a bit of tweaking, in my estimation, leading to a search for new semlor recipes, in hopes of one day doing a thorough side-by-side and finding the perfect recipe.
Now, I find myself in a difficult place...I don't have the time or calories to make the eight different recipes and test them thoroughly as I would like. And semlor are particularly difficult because they don't keep all that well once they're assembled, and they don't keep particularly well when they're not assembled, either. This is a problem.
Truly, this is when I really resent that I can't just stay home for a week and troubleshoot and try things. One may argue that this is similar to lab work, so I'm lucky to be in the profession I am, "investigating" all day in lab. But that person has obviously never been in a lab before. Lab work is far less tasty, and the diversity of ingredients in cooking make it far more fun than "add this clear liquid to these other two clear liquids..."
But I've digressed long enough. The solution is to mix my passion for semlor with my dedication to providing interesting muffins once a week to my girls. Almond, a bit of cardamom, I think I can make this work. Glad Fettisdagen, everyone!
Semlor Muffins
my original recipe, with inspiration from many recipes; marzipan recipe adapted from Smitten Kitchen
Some notes:
---the marzipan recipe provided makes enough for three batches of muffins---you could try making just enough for what you need, but be sure to use one of the mini food processors, otherwise, your almonds won't be finely ground enough.
---all ingredients are given in volume as well as mass, but if you don't have a kitchen scale and love to bake, buy a scale, I implore you. The one I have costs $25, and it's worth it!
---preground cardamom goes stale quickly; your best bet is to buy the dark-colored seeds and grind them with a spice grinder or mortar and pestle right before use (side benefit? whole spices last far longer than preground!)
---I use these muffin pans and these muffin cups. When you're making so many at a time, having pans that behave in the same way (no mixing metals), you ensure that cooking times are the same.
Ingredients
----Marzipan
8 ounces blanched almonds
210 grams powdered sugar (1 3/4 cup powdered sugar)
1 tablespoon almond extract
80 grams maple syrup (1/4 cup)
----Muffins
94 grams all purpose flour (3/4 cup)
90 grams whole wheat flour (3/4 cup)
3/4 teaspoon baking powder
1/4 teaspoon salt
1/2 - 1 teaspoon freshly ground cardamom
6 tablespoons butter, room temperature
120 grams milk, preferably whole (1/2 cup; 4 fluid ounces)
56 grams amaretto liqueur or almond extract (1/4 cup; 2 fluid ounces)
6 ounces marzipan
220 grams turbinado sugar (1 cup)
2 eggs
Instructions
1. Grind almonds in a food processor for about two minutes; it will first be kind of crumbly, and then the crumbs will get smaller and smaller. Keep going, and once it starts to clump, stop (we're not making almond butter)
2. Sift powdered sugar. I like to use a large sieve over a workbowl and press the sugar and clumps through versus using a metal sifter. You just can't get them very clean or dry without rusting, and they make a lot of noise.
3. Add powdered sugar and almond extract to the food processor workbowl and turn on until mixture is homogenous.
4. Turn out the marzipan mixture into a large bowl and pseudo-knead until it comes together. Add more powdered sugar or maple syrup depending on the texture.
5. Store in the fridge, tightly wrapped or in an airtight container.
6. Preheat oven to 350ºF.
7. Whisk together flours, baking powder, cardamom, and salt. Set aside
8. Combine amaretto and milk in a small measuring cup with a spout.
9. In the bowl of your mixer, start your mixer on slow, and ramp up to medium-high to cream the butter and marzipan together.
10. Once the mixture is homogeneous, slow down the mixer and add the sugar a bit at a time.
11. Once all the sugar has been added, turn the mixer back up to medium-high and combine until homogeneous.
12. Turn the mixer down to medium low and add the eggs, one at a time.
13. Scrape down the sides of the mixer, and beat again briefly to ensure the mixture is fully combined.
14. Add flour to the mixture a little at a time. Add about a third of the amaretto and milk mixture, and continue to alternate, ending with flour. Do not overbeat.
15. Use a cookie scoop to dispense batter into muffin cups. Do not overfill. This recipe made me about 20 muffins per batch.
16. Bake muffins 20-25 minutes until a toothpick or fork inserted in the center comes out clean.
17. Let muffins cool about five minutes in the pan, and then remove them to a cooling rack. Eat that day if you want to preserve the lovely somewhat crunchy top, or store in an airtight container.
Thursday, February 14, 2013
Happy Valentine's Day!
I'm off at orchestra rehearsal for Rite of Spring, killing a virgin, you know, the usual. Here's hoping your Valentine's Day is a little less...intense.
Dictator Valentines from Ben Kling.
Arrested Development Valentines from Beth at Shimmering and White (found via Craftzine)
I adore vintage valentines, these are from various Etsy sellers over the years.
Dictator Valentines from Ben Kling.
Arrested Development Valentines from Beth at Shimmering and White (found via Craftzine)
Tuesday, February 12, 2013
Winter Storm Nemo: The Cocktail
Winter Storm Nemo has given me the gift of time to cook and bake: a double batch of vegan chili, strawberry rhubarb crunch, a double batch of eggplant parmesean, cauliflower gorgonzola soup, muffins for the week... Oh! And three batches of ice cream, because I kind of forgot to use the heavy cream I bought for the study break on Friday night, oops. Which obviously means ice cream, right?
And in the tradition of storms past (Hurricane Irene; Hurricane Sandy), and because I was so good at resisting the temptation of 50 pounds of chocolate at the aforementioned McCormick study break, I concocted a drink named after the lovely mix of snow, ice, and wind that came our way.
Winter Storm Nemo
Inspiration from Martha Stewart's Blizzard Cocktail (and any other smart person who mixes hot chocolate with alcohol)
While this drink uses hazelnut and black currant, this drink doesn't scream either flavor to me (like creme de menthe would, for example). I love the interplay of nuts and fruit, so I decided straightaway to use Frangelico, and then I choose the black currant since it shares the same somewhat bitter undertone of chocolate. Since this was a one shot deal (before I had to beg friends to come over and try my cocoa! with booze! please! taste test!) --- well, I was a little worried. But it turned out rather well, if I do say so myself.
1 cup whole milk
3 tablespoons hot cocoa mix
1 ounce Frangelico (hazelnut liqueur)
1/2 ounce creme de cassis (black currant liqueur)
1. The best way to make hot cocoa is with a cocomotion. Yes, I know it's plastic. Yes, I know it looks kind of hideous. Yes, I know that you don't have room on your countertop. If you don't have the room and drink hot cocoa more than once a week, make room. Cocoa with water simply does not taste as creamy (the fat in the cocoa doesn't dissolve well in water). And heating up milk can cause all sorts of problems, most likely that you'll scald it and it will taste nasty and burnt. So - a machine that stirs and heat concurrently is exactly what you want, and this is exactly what a cocomotion does. So do not hate. It is the perfect tool for the job.
2. Mix all ingredients in cocomotion. Press the on button. It will stop when your cocoa is at the perfect 194ºF. (If you are making hot cocoa for more than just yourself, you can add the alcohol after the cocoa is mixed, no problem)
Now, my general opinion is that some things are worth splurging on. You will never catch me drinking sugar free cocoa made with water or diet soda, just as you'll never catch me eating those weird Laughing Cow wedges of cheese-like product. If you're going to go all out, go all out. This drink comes in at a somewhat terrifying 400 calories, but hey, it's cold out, right? And making snow angels counts as exercise, right?
Saturday, February 9, 2013
Winter Storm Nemo
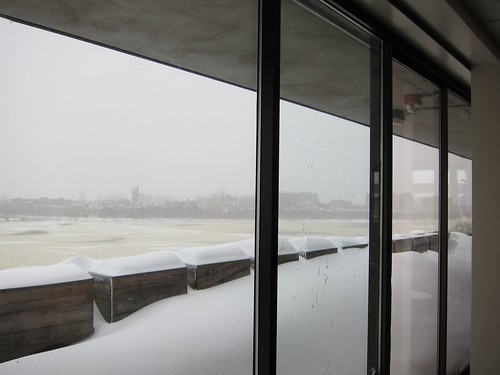
It's 10 am, Boston is experiencing wind gusts up to 30 mph, it's still snowing like crazy, and I am so glad to be inside, cozy and warm. It's a perfect day to read a book, eat chili, and watch the snow come down.
I did venture up to the Penthouse to take some pictures, and even though I bundled up, I didn't end up going outside since the drift at the only door was four feet high. Alas, my bib snow pants are at home in Minnesota...
This is the front door to the building - the snow has drifted so much that you can barely get out the door.
Most of the trees are actually bare because of the wind, but this one on the river side of the building is protected from larger trees, so you can really see how much snow we've gotten. We're up to about 18 inches so far, I think. Different sources are giving different totals, it's been so windy that it's hard to tell!
Now, the real problem that I see is because it was wet snow hovering around 32ºF, 33ºF, there is a slick layer of ice underneath all of the snow. I originally thought that the Governor's ban on non-emergency vehicles ($500 fine!) was a little wussy...not anymore. It is dangerous to be out there right now.
I did venture up to the Penthouse to take some pictures, and even though I bundled up, I didn't end up going outside since the drift at the only door was four feet high. Alas, my bib snow pants are at home in Minnesota...
The table you see there is about waist high. The drifts at the other end of the courtyard are about six feet high!
This is the front door to the building - the snow has drifted so much that you can barely get out the door.
Most of the trees are actually bare because of the wind, but this one on the river side of the building is protected from larger trees, so you can really see how much snow we've gotten. We're up to about 18 inches so far, I think. Different sources are giving different totals, it's been so windy that it's hard to tell!
Now, the real problem that I see is because it was wet snow hovering around 32ºF, 33ºF, there is a slick layer of ice underneath all of the snow. I originally thought that the Governor's ban on non-emergency vehicles ($500 fine!) was a little wussy...not anymore. It is dangerous to be out there right now.
Friday, February 8, 2013
Wednesday, February 6, 2013
Lego building
Legos and superglue, the makings of a great Saturday! (I can't believe that this is a volunteer gig)
Monday, February 4, 2013
Downton Abbey!
Downton Abbey is everywhere. And I love it.
Vogue spreads with the lovely Mary, Edith, and Sybil...glorious.
And then after watching the first episode of the first season in Philly, the theme tune was still in my head, and my host looked at me imploring, "Why are you humming X-Files?"
There are no words.
Even Sesame Street is involved. So awesome.
Vogue spreads with the lovely Mary, Edith, and Sybil...glorious.
Saturday, February 2, 2013
An Ideal Husband
For my visit in Philadelphia, one of my friends suggested seeing a play - and we ended up seeing the Oscar Wilde play "An Ideal Husband" (for those of you with netflix, there is a version on instant watch from 1999 with Rupert Everett, Minnie Driver, Cate Blanchett, and Julianne Moore as the devious Mrs. Cheveley...it's fairly close to the original play, but some things have been changed a bit). I adore Oscar Wilde --- he's witty, provides social commentary relevant almost 120 years post writing, and he simply makes me laugh.
Subscribe to:
Posts (Atom)


